Web Application Development Tutorial - Part 9: Authors: User Interface
- Entity Framework Core as the ORM provider.
- MVC / Razor Pages as the UI Framework.
This tutorial is organized as the following parts;
- Part 1: Creating the server side
- Part 3: Creating, updating and deleting books
- Part 5: Authorization
- Part 7: Authors: Database Integration
- Part 9: Authors: User Interface (this part)
- Part 10: Book to Author Relation
This tutorials has multiple versions based on your UI and Database preferences. We’ve prepared two combinations of the source code to be downloaded:
Introduction
This part explains how to create a CRUD page for the Author entity introduced in previous parts.
Create a new razor page, Index.cshtml under the Pages/Authors folder of the Acme.BookStore.Web project and change the content as given below.
Index.cshtml
This is a simple page similar to the Books page we had created before. It imports a JavaScript file which will be introduced below.
IndexModel.cshtml.cs
using Microsoft.AspNetCore.Mvc.RazorPages;namespace Acme.BookStore.Web.Pages.Authors{public class IndexModel : PageModel{public void OnGet(){}}}
$(function () {var l = abp.localization.getResource('BookStore');var createModal = new abp.ModalManager(abp.appPath + 'Authors/CreateModal');var editModal = new abp.ModalManager(abp.appPath + 'Authors/EditModal');var dataTable = $('#AuthorsTable').DataTable(abp.libs.datatables.normalizeConfiguration({serverSide: true,paging: true,order: [[1, "asc"]],searching: false,scrollX: true,ajax: abp.libs.datatables.createAjax(acme.bookStore.authors.author.getList),columnDefs: [{title: l('Actions'),rowAction: {items:[{text: l('Edit'),visible:abp.auth.isGranted('BookStore.Authors.Edit'),action: function (data) {editModal.open({ id: data.record.id });}},{text: l('Delete'),visible:abp.auth.isGranted('BookStore.Authors.Delete'),return l('AuthorDeletionConfirmationMessage',data.record.name);},action: function (data) {acme.bookStore.authors.author.delete(data.record.id).then(function() {abp.notify.info(l('SuccessfullyDeleted'));dataTable.ajax.reload();});}}]}},{title: l('Name'),data: "name"},{title: l('BirthDate'),data: "birthDate",render: function (data) {return luxon.DateTimelocale: abp.localization.currentCulture.name}).toLocaleString();}}]}));createModal.onResult(function () {dataTable.ajax.reload();});editModal.onResult(function () {dataTable.ajax.reload();});$('#NewAuthorButton').click(function (e) {e.preventDefault();createModal.open();});});
Briefly, this JavaScript page;
- Creates a Data table with
Actions,NameandBirthDatecolumns.Actionscolumn is used to add Edit and Delete actions.BirthDateprovides arenderfunction to format theDateTimevalue using the luxon library.
- Uses the
abp.ModalManagerto open Create and Edit modal forms.
This code is very similar to the Books page created before, so we will not explain it more.
Localizations
This page uses some localization keys we need to declare. Open the en.json file under the Localization/BookStore folder of the Acme.BookStore.Domain.Shared project and add the following entries:
Notice that we’ve added more keys. They will be used in the next sections.
Add to the Main Menu
if (await context.IsGrantedAsync(BookStorePermissions.Authors.Default)){bookStoreMenu.AddItem(new ApplicationMenuItem("BooksStore.Authors",l["Menu:Authors"],url: "/Authors"));}
Run and login to the application. You can not see the menu item since you don’t have permission yet. Go to the Identity/Roles page, click to the Actions button and select the Permissions action for the admin role:
As you see, the admin role has no Author Management permissions yet. Click to the checkboxes and save the modal to grant the necessary permissions. You will see the Authors menu item under the Book Store in the main menu, after refreshing the page:
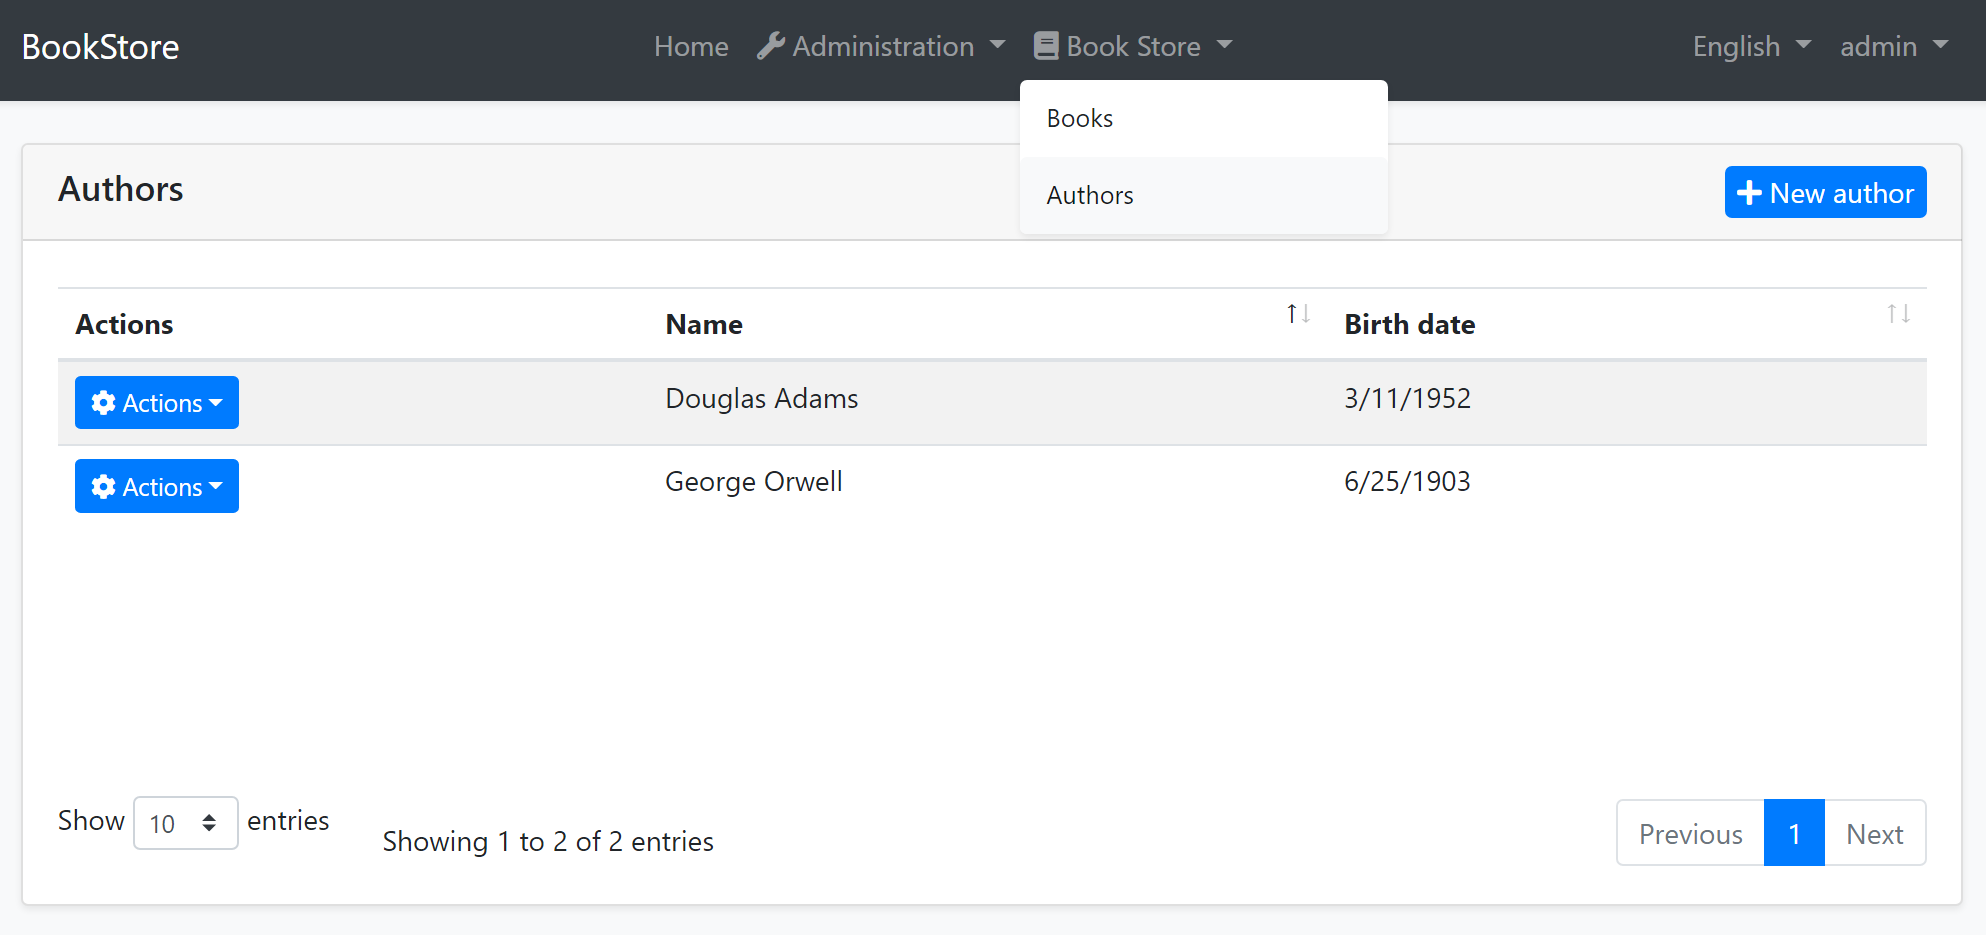
The page is fully working except New author and Actions/Edit since we haven’t implemented them yet.
Create Modal
Create a new razor page, CreateModal.cshtml under the Pages/Authors folder of the Acme.BookStore.Web project and change the content as given below.
CreateModal.cshtml
@page@using Acme.BookStore.Localization@using Acme.BookStore.Web.Pages.Authors@using Microsoft.Extensions.Localization@using Volo.Abp.AspNetCore.Mvc.UI.Bootstrap.TagHelpers.Modal@model CreateModalModel@inject IStringLocalizer<BookStoreResource> L@{Layout = null;}<form asp-page="/Authors/CreateModal"><abp-modal-header title="@L["NewAuthor"].Value"></abp-modal-header><abp-modal-body><abp-input asp-for="Author.Name" /><abp-input asp-for="Author.BirthDate" /><abp-input asp-for="Author.ShortBio" /></abp-modal-body><abp-modal-footer buttons="@(AbpModalButtons.Cancel|AbpModalButtons.Save)"></abp-modal-footer></abp-modal></form>
We had used of the ABP Framework for the books page before. We could use the same approach here, but we wanted to show how to do it manually. Actually, not so manually, because we’ve used abp-input tag helper in this case to simplify creating the form elements.
You can definitely use the standard Bootstrap HTML structure, but it requires to write a lot of code. abp-input automatically adds validation, localization and other standard elements based on the data type.
CreateModal.cshtml.cs
The main reason of this decision was to show you how to use a different model class inside the page. But there is one more benefit: We added two attributes to the class members, which were not present in the CreateAuthorDto:
- Added
[DataType(DataType.Date)]attribute to the which shows a date picker on the UI for this property. - Added
[TextArea]attribute to theShortBiowhich shows a multi-line text area instead of a standard textbox.
In this way, you can specialize the view model class based on your UI requirements without touching to the DTO. As a result of this decision, we have used ObjectMapper to map CreateAuthorViewModel to CreateAuthorDto. To be able to do that, you need to add a new mapping code to the BookStoreWebAutoMapperProfile constructor:
using Acme.BookStore.Authors; // ADDED NAMESPACE IMPORTusing Acme.BookStore.Books;using AutoMapper;namespace Acme.BookStore.Web{public class BookStoreWebAutoMapperProfile : Profile{public BookStoreWebAutoMapperProfile(){CreateMap<BookDto, CreateUpdateBookDto>();// ADD a NEW MAPPINGCreateMap<Pages.Authors.CreateModalModel.CreateAuthorViewModel,CreateAuthorDto>();}}}
“New author” button will work as expected and open a new model when you run the application again:
Create a new razor page, EditModal.cshtml under the Pages/Authors folder of the Acme.BookStore.Web project and change the content as given below.
@page@using Acme.BookStore.Localization@using Acme.BookStore.Web.Pages.Authors@using Microsoft.Extensions.Localization@using Volo.Abp.AspNetCore.Mvc.UI.Bootstrap.TagHelpers.Modal@model EditModalModel@inject IStringLocalizer<BookStoreResource> L@{Layout = null;}<form asp-page="/Authors/EditModal"><abp-modal><abp-modal-header title="@L["Update"].Value"></abp-modal-header><abp-modal-body><abp-input asp-for="Author.Id" /><abp-input asp-for="Author.Name" /><abp-input asp-for="Author.BirthDate" /><abp-input asp-for="Author.ShortBio" /></abp-modal-body><abp-modal-footer buttons="@(AbpModalButtons.Cancel|AbpModalButtons.Save)"></abp-modal-footer></abp-modal></form>
EditModal.cshtml.cs
This class is similar to the CreateModal.cshtml.cs while there are some main differences;
- Uses the
IAuthorAppService.GetAsync(...)method to get the editing author from the application layer. EditAuthorViewModelhas an additionalIdproperty which is marked with the[HiddenInput]attribute that creates a hidden input for this property.
This class requires to add two object mapping declarations to the BookStoreWebAutoMapperProfile class:
using Acme.BookStore.Authors;using Acme.BookStore.Books;using AutoMapper;namespace Acme.BookStore.Web{public class BookStoreWebAutoMapperProfile : Profile{public BookStoreWebAutoMapperProfile(){CreateMap<BookDto, CreateUpdateBookDto>();CreateMap<Pages.Authors.CreateModalModel.CreateAuthorViewModel,CreateAuthorDto>();// ADD THESE NEW MAPPINGSCreateMap<AuthorDto, Pages.Authors.EditModalModel.EditAuthorViewModel>();CreateMap<Pages.Authors.EditModalModel.EditAuthorViewModel,UpdateAuthorDto>();}}
That’s all! You can run the application and try to edit an author.
The Next Part
See the next part of this tutorial.
