
Enable Istio on all the microservices
For the purpose of this tutorial, scale the deployments of the microservices down to 1:
Redeploy the Bookinfo application, Istio-enabled. The service
productpagewill not be redeployed since it already has Istio injected, and its pods will not be changed. This time you will use only a single replica of a microservice.Check the application pods and verify that now each pod has two containers. One container is the microservice itself, the other is the sidecar proxy attached to it:
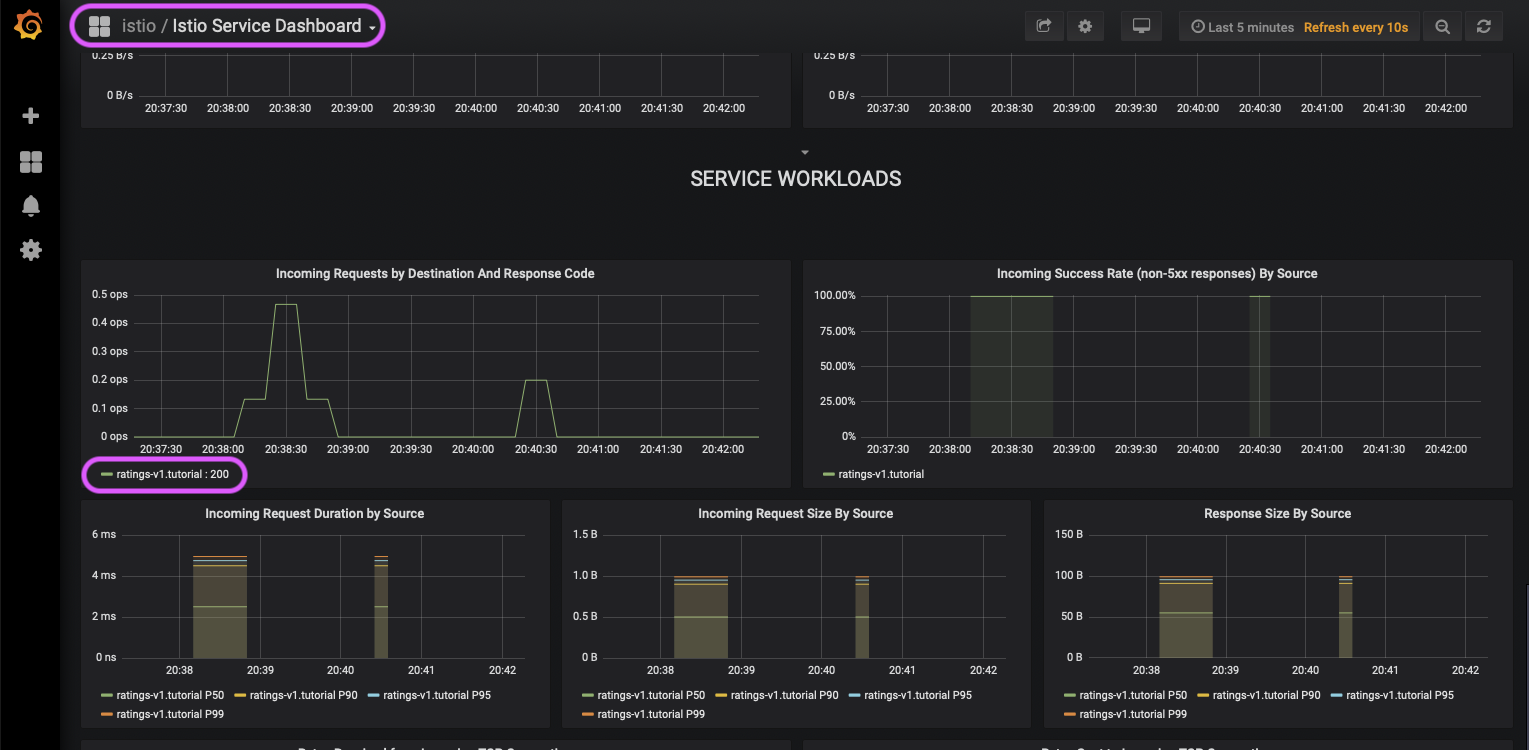
Access the Istio dashboard using the custom URL you set in your file :
Check some other microservice in Istio Service Dashboard, e.g.
ratings:Istio Service Dashboard
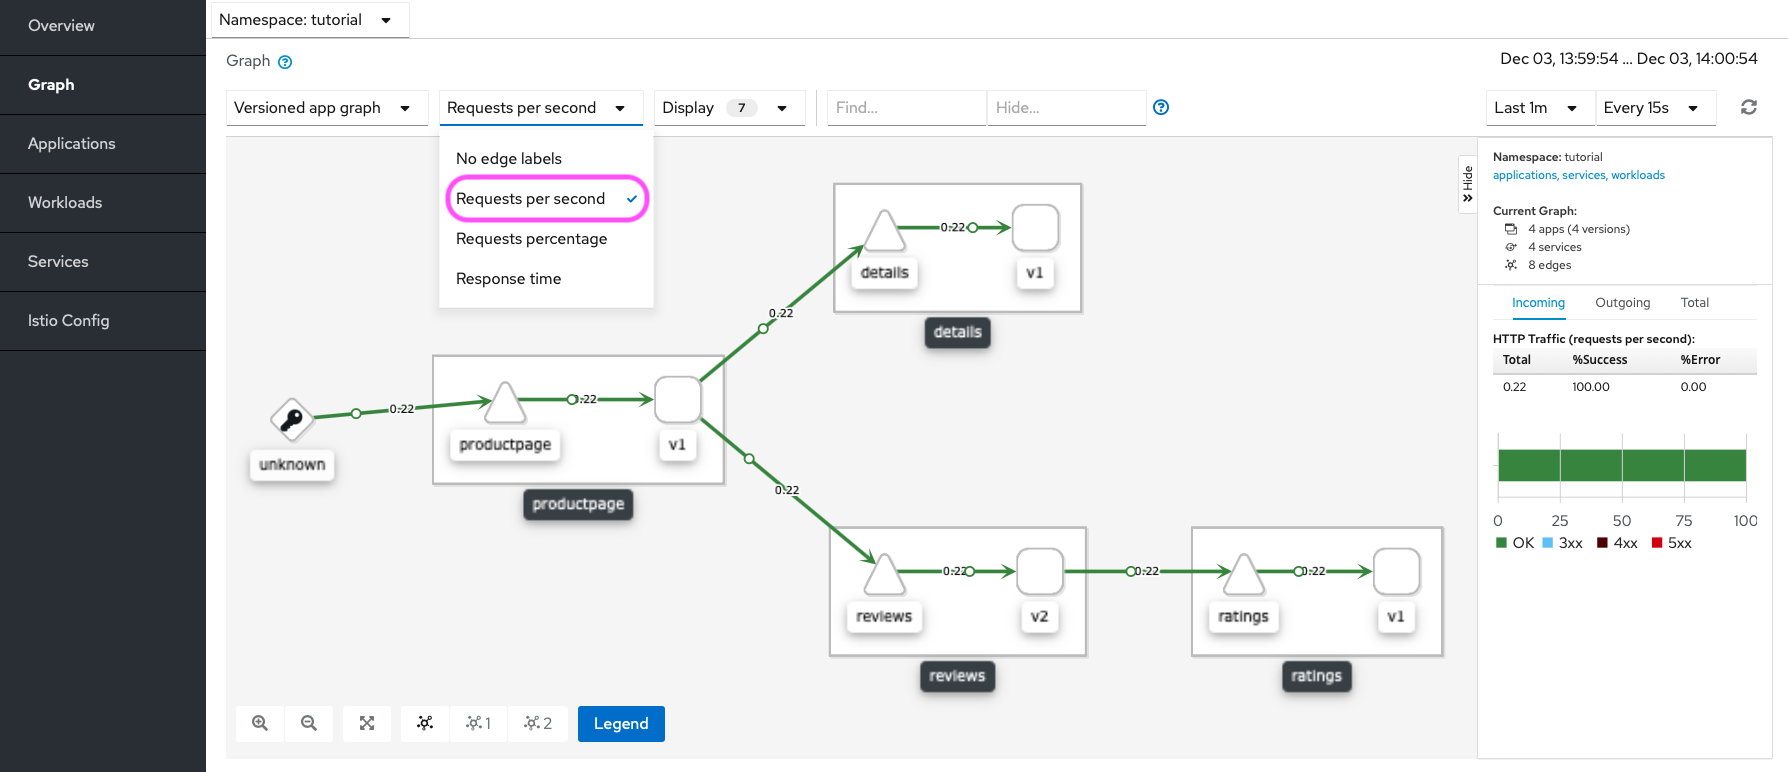
Visualize your application’s topology by using the console, which is not a part of Istio, but is installed as part of the configuration. Access the dashboard using the custom URL you set in your
/etc/hostsfile previously:If you installed Kiali as part of the instructions, your Kiali console user name is and the password is
admin.Try different options in the Edge Labels drop-down menu. Hover with the mouse over the nodes and edges of the graph. Notice the traffic metrics on the right.

Kiali Graph Tab, edge labels drop-down menu
You are ready to configure the Istio Ingress Gateway.

