
Enable Istio on productpage
In this module you enable Istio on a single microservice, . The rest of the application will continue to operate as before. Note that you can enable Istio gradually, microservice by microservice. Istio is enabled transparently to the microservices. You do not change the microservices code or disrupt your application, it continues to run and serve user requests.
Apply the default destination rules:
Redeploy the
productpagemicroservice, Istio-enabled:This tutorial step demonstrates manual sidecar injection to enable Istio for instructional purposes, however is more convenient.
$ curl -s https://raw.githubusercontent.com/istio/istio/release-1.10/samples/bookinfo/platform/kube/bookinfo.yaml | istioctl kube-inject -f - | sed 's/replicas: 1/replicas: 3/g' | kubectl apply -l app=productpage,version=v1 -f -deployment.apps/productpage-v1 configured
Access the application’s webpage and verify that the application continues to work. Istio was added without changing the code of the original application.
Kubernetes replaced the original pods of
productpagewith the Istio-enabled pods, transparently and incrementally, performing a rolling update. Kubernetes terminated an old pod only when a new pod started to run, and it transparently switched the traffic to the new pods, one by one. That is, it did not terminate more than one pod before it stated a new pod. All this was done to prevent disruption of your application, so it continued to work during the injection of Istio.-
$ kubectl logs -l app=productpage -c istio-proxy | grep GET...[2019-02-15T09:06:04.079Z] "GET /details/0 HTTP/1.1" 200 - 0 178 5 3 "-" "Mozilla/5.0 (Macintosh; Intel Mac OS X 10_14) AppleWebKit/605.1.15 (KHTML, like Gecko) Version/12.0 Safari/605.1.15" "18710783-58a1-9e5f-992c-9ceff05b74c5" "details:9080" "172.30.230.51:9080" outbound|9080||details.tutorial.svc.cluster.local - 172.21.109.216:9080 172.30.146.104:58698 -[2019-02-15T09:06:04.053Z] "GET /productpage HTTP/1.1" 200 - 0 5723 90 83 "10.127.220.66" "Mozilla/5.0 (Macintosh; Intel Mac OS X 10_14) AppleWebKit/605.1.15 (KHTML, like Gecko) Version/12.0 Safari/605.1.15" "18710783-58a1-9e5f-992c-9ceff05b74c5" "tutorial.bookinfo.com" "127.0.0.1:9080" inbound|9080|http|productpage.tutorial.svc.cluster.local - 172.30.146.104:9080 10.127.220.66:0 -
Output the name of your namespace. You will need it to recognize your microservices in the Istio dashboard:
Check the Istio dashboard, using the custom URL you set in your file :
http://my-istio-dashboard.io/dashboard/db/istio-mesh-dashboard
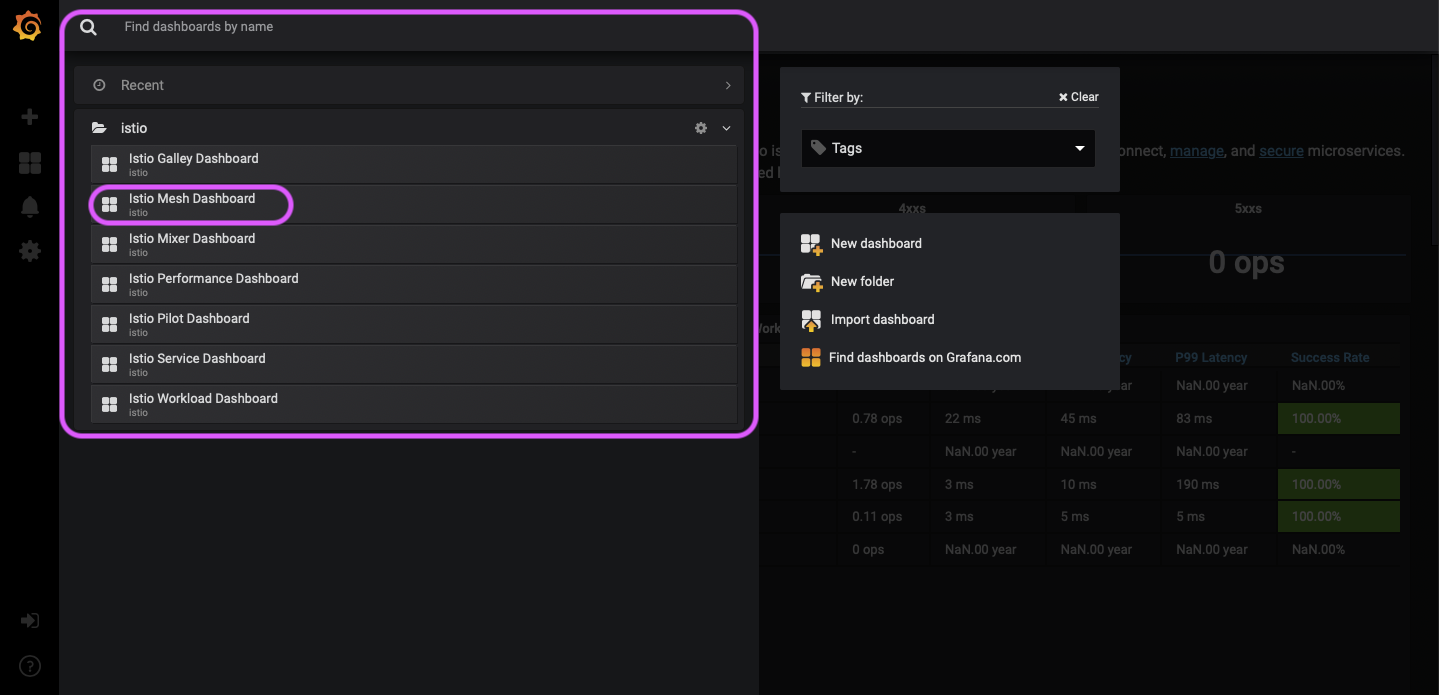
In the top left drop-down menu, select Istio Mesh Dashboard.
Select Istio Mesh Dashboard from the top left drop-down menu
Notice the
productpageservice from your namespace, it’s name should beproductpage.<your namespace>.svc.cluster.local.In the Istio Mesh Dashboard, under the
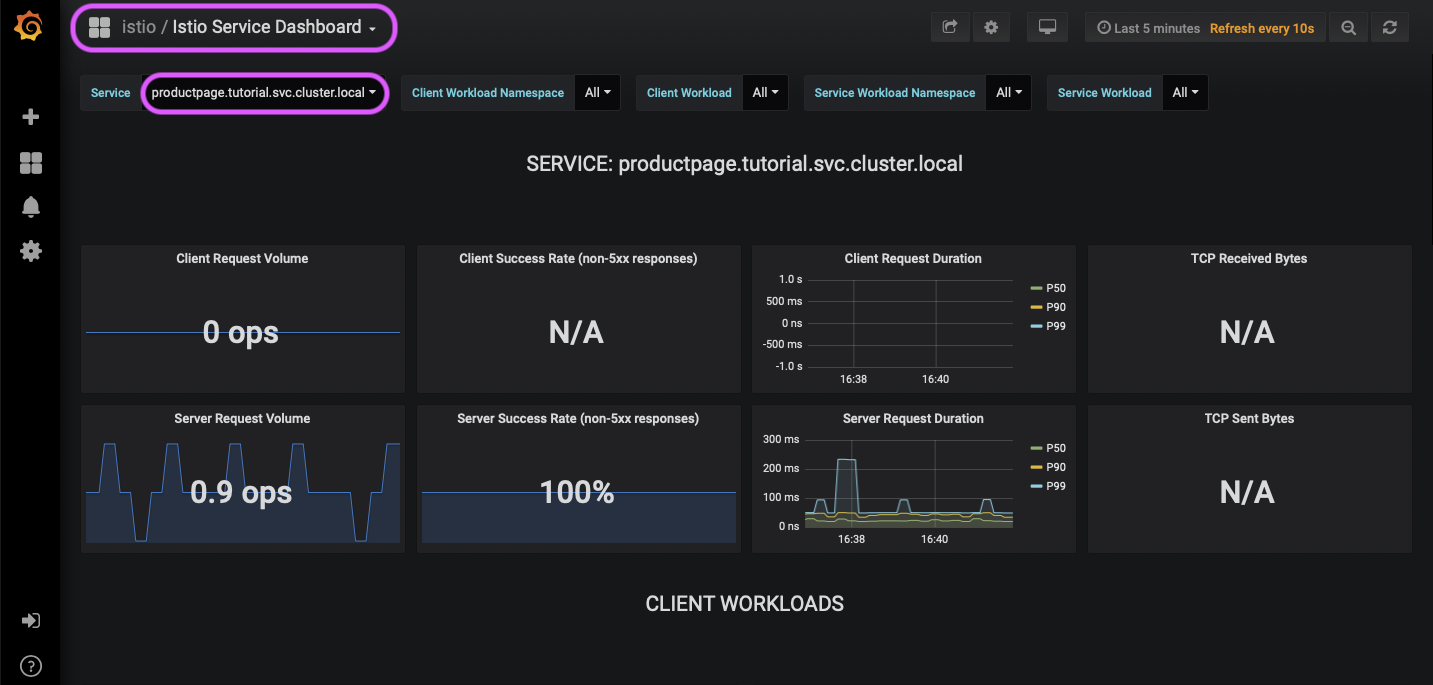
Servicecolumn, click theproductpageservice.Istio Service Dashboard, `productpage` selected
Scroll down to the Service Workloads section. Observe that the dashboard graphs are updated.
Istio Service Dashboard
This is the immediate benefit of applying Istio on a single microservice. You receive logs of traffic to and from the microservice, including time, HTTP method, path, and response code. You can monitor your microservice using the Istio dashboard.
You are ready to enable Istio on all the microservices.

