
Exporting for iOS
- Download the Godot export templates. Use the Godot menu: Editor > Manage Export Templates
In the Godot editor, open the Export window from the Project menu. When the Export window opens, click Add.. and select iOS.
The following export options are required. Leaving any blank will cause the exporter to throw an error:
After you click Export Project, there are still two important options left:
Note
This tutorial uses exported_xcode_project_name, but you will use your project’s name. When you see exported_xcode_project_name in the following steps, replace it with the name you used instead.
Note
When the export completes, the output folder should look like this:
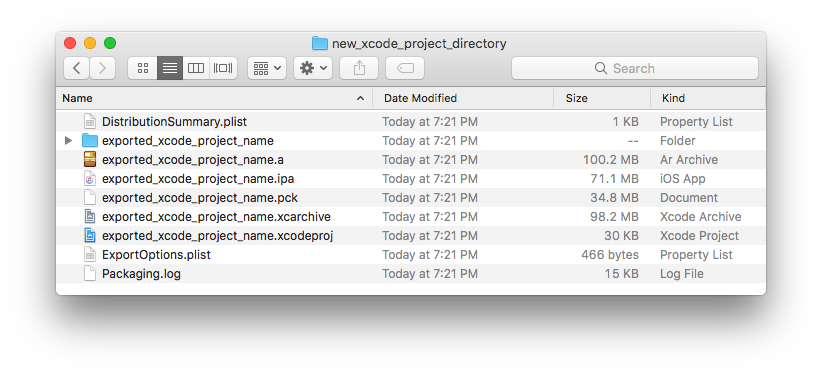
Opening exported_xcode_project_name.xcodeproj lets you build and deploy like any other iOS app.
The above method creates an exported project that you can build for release, but you have to re-export every time you make a change in Godot.
While developing, you can speed this process up by linking your Godot project files directly into your app.
In the following example:
Note
- Start from an exported iOS project (follow the steps above).
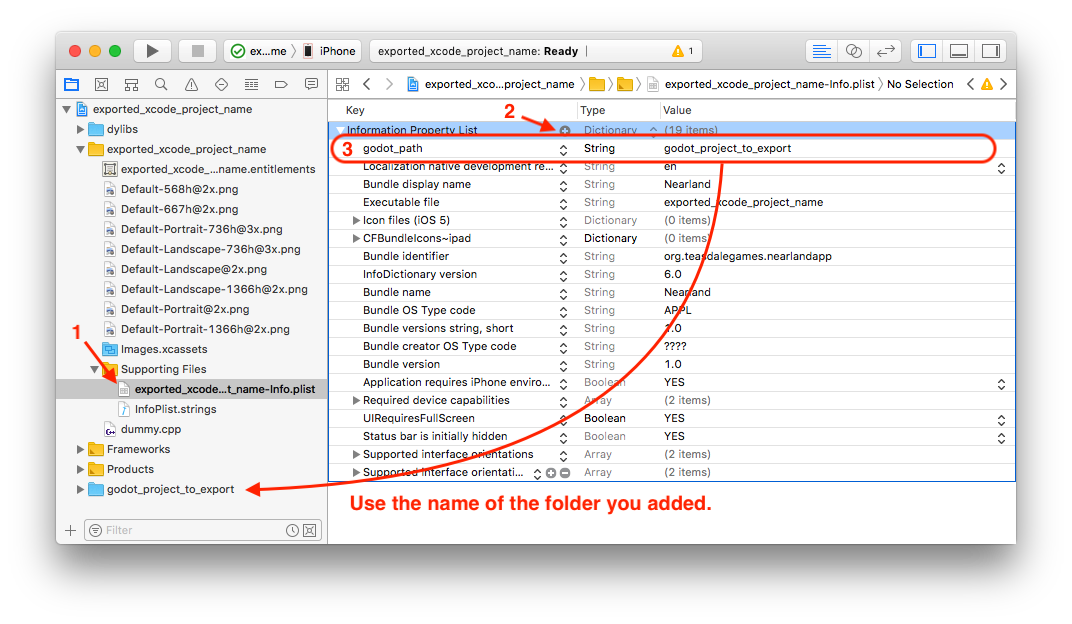
- In Finder, drag the Godot project folder into the Xcode file browser.
3. In the dialog, make sure Create folder references is selected. This means you will be able to continue to edit your Godot project in its current location.

- Delete exported_xcode_project_name.pck from the Xcode project.
6. Open exported_xcode_project_name-Info.plist and add a string property named godot_path (this is the real key name) with a value godot_project_to_export (this is the name of your project)
That’s it! You can now edit your project in the Godot editor and build it in Xcode when you want to run it on a device.

