
Installing plugins
The preferred way to find Godot plugins is to use the . While it can be browsed online, it’s more convenient to use it directly from the editor. To do so, click the AssetLib tab at the top of the editor:
You can also find assets on code hosting websites such as GitHub.
Note
One way to distinguish editor plugins from non-editor plugins is to look for a file in the repository that hosts the plugin. If the repository contains a plugin.cfg file in a folder placed in the folder, then it is an editor plugin.
To install a plugin, download it as a ZIP archive. On the Asset Library, this can be done using the Download button, either from the editor or using the Web interface.
On GitHub, if a plugin has tags (versions) declared, go to the Releases tab to download a stable release. This ensures you download a version that was declared to be stable by its author.
On GitHub, if the plugin doesn’t have any tags declared, use the Download ZIP button to download a ZIP of the latest revision:
Extract the ZIP archive and move the addons/ folder it contains into your project folder. If your project already contains an folder, move the plugin’s addons/ folder into your project folder to merge the new folder contents with the existing one. Your file manager may ask you whether to write into the folder; answer Yes. No files will be overwritten in the process.
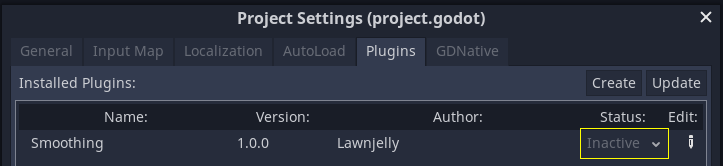
To enable the freshly installed plugin, open Project > Project Settings at the top of the editor then go the Plugins tab. If the plugin was packaged correctly, you should see it in the list of plugins. Click on the gray Inactive text and choose Active to enable the plugin. The word Active will display in green to confirm the plugin was enabled.
You can use the plugin immediately after enabling it; there’s no need to restart the editor. Likewise, disabling a plugin can be done without having to restart the editor.

